Wednesday, January 04, 2012
Mark and Gaz
As regular followers of our blog will know we have been building a koi pond over the last 18 months. We have posted a selection of photos as work has progressed, but with the start of a new year we thought it would be a good time to explain the project so far.
We had previously built a small pond, that had originally been envisaged as a goldfish pond, however it was large enough for a few Koi and that sparked a keen interest in these elegant and beautiful fish. That original pond had various filter upgrades applied to ensure we could provide a good standard of water, but we knew that at some point we would want to build a larger pond.
Spending quite a lot of time debating the style and layout for the new pond, the design was sketched, tweaked and refined several times over the winter of 2009-10. I still have some of those sketches, made on the hotel note paper from a trip to Madeira late 2009.
As winter is not the best time to start digging out a pond we waited for the following spring. When the usual spring tidy up and planting had been completed we turned our attention to the new project. By which time we had the layout worked out in quite a lot of detail, aproximately a 20x10x6foot rectangular formal pond, with a curved path and raised beds leading to a seating area.
At the far end of the pond we planned to build a filtration house which would also screen off a garden utility area with 2 greenhouses and coldframes.
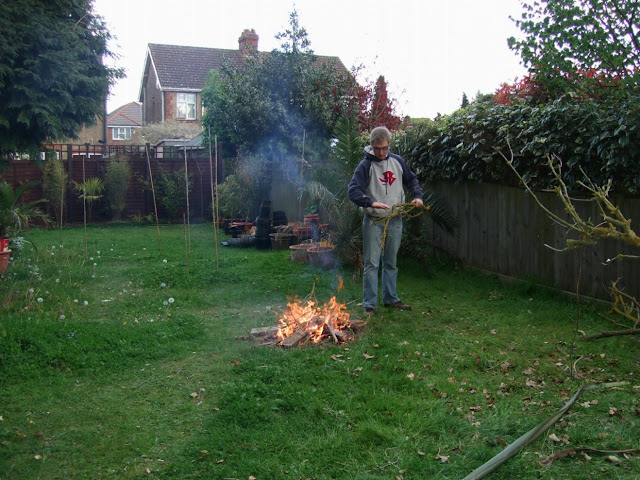 |
| Burning garden waste at the start of the project. |
|
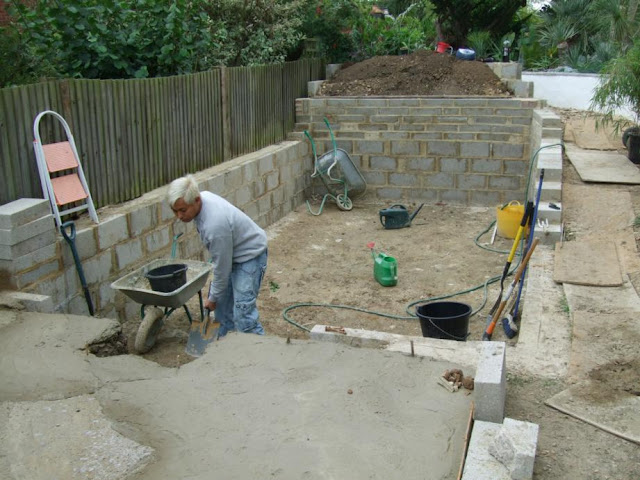
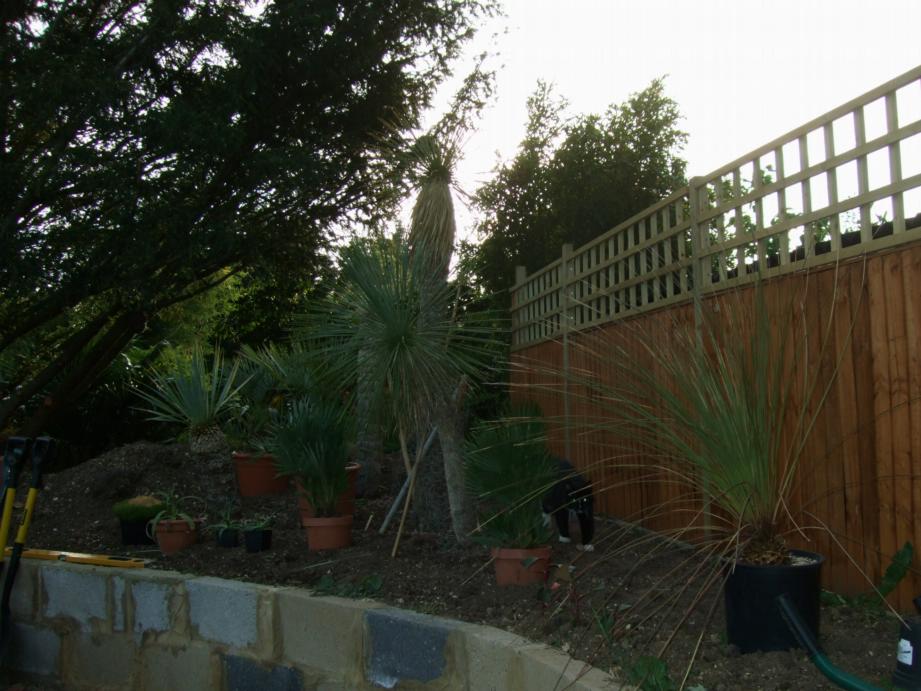
| Getting started with the first raised bed. |
|
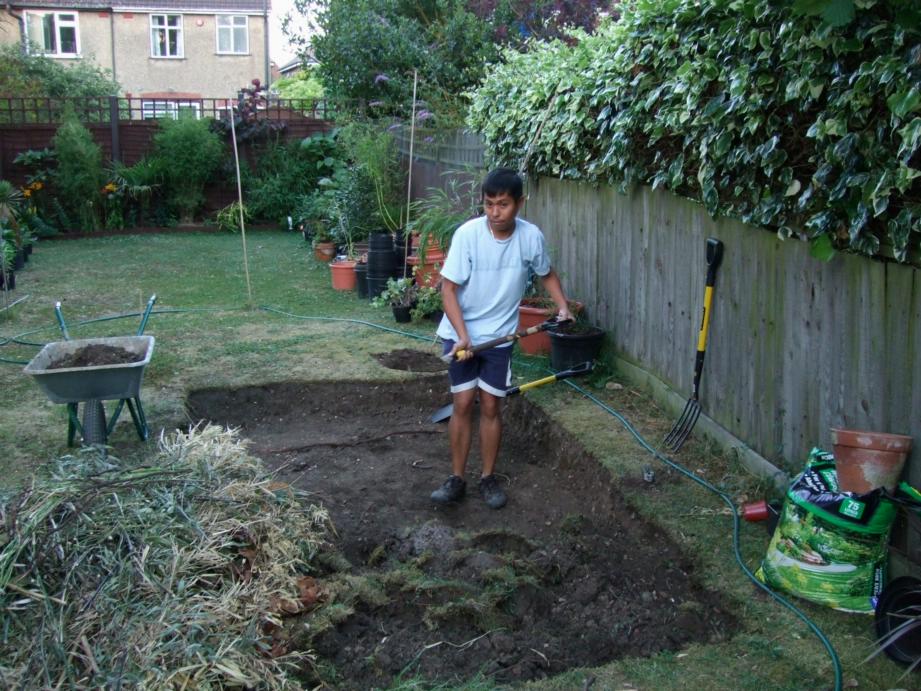
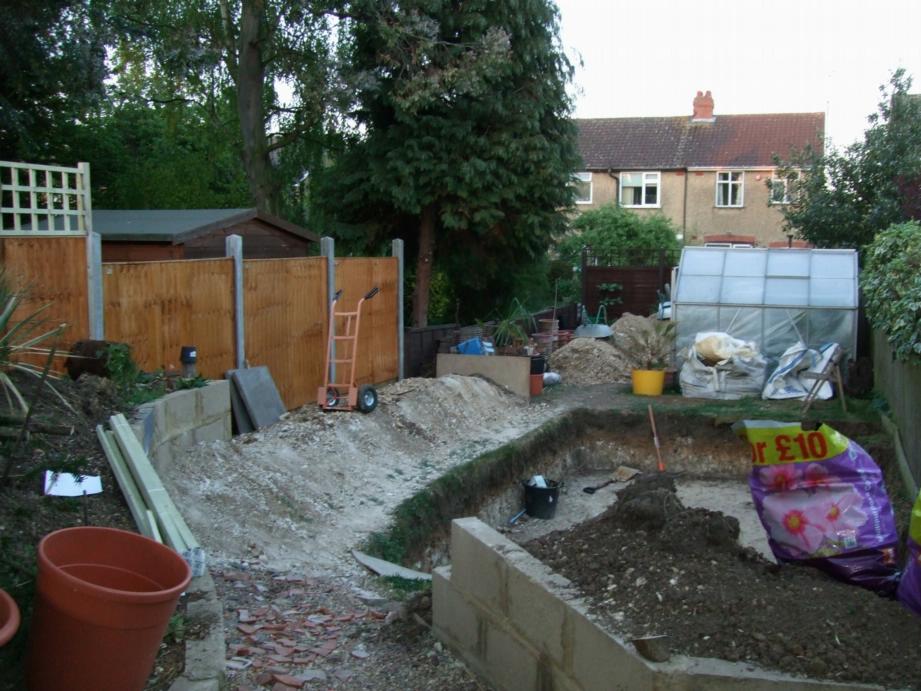
| View across what will one day be the pond. |
 |
| This was taken on Mark's birthday, there's dedication to the cause! |
So with all this in mind we started work in May 2010. The first job was to build initial retaining walls for the first raised bed. We wanted to integrate a raised pond with raised beds to ensure the whole section of the garden was of a coherent design. Once these walls were built we could start the dig.
I calculated that we would be digging out something in the region of 35 tonnes of clay and chalk, and this all had to be dug by hand as we only have a very narrow and awkward access to the back of the garden. We knew that this task would be the biggest single job in the whole project, so much so that we knew it would not be completed before the autumn and wet weather weather arrived.
However that first summer we dug out most of the planned hole and had started the second raised bed. After about a foot of top soil we hit solid chalk, something we knew we would have to face, but had hoped it would be much deeper down than just a foot.
|
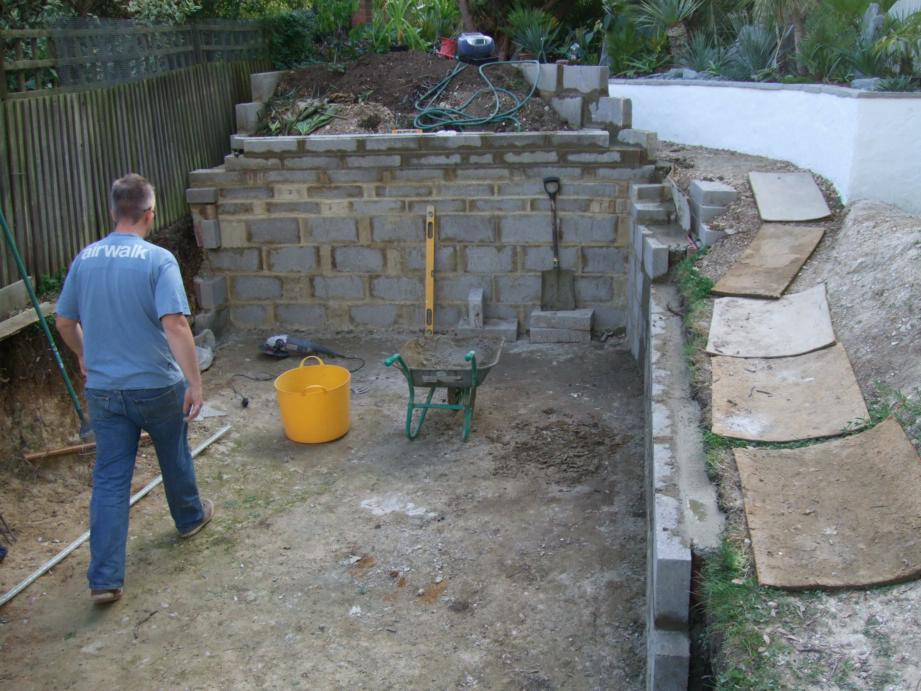
| Mark doing all the hard work again! |
We developed individual tasks and skills for this (and not to mention developed muscles we had not used so much before). I would use the pick axe and fork to break the chalk, and Mark would shovel out the chalk into a barrow to be wheeled away.
During the winter we spent a lot of time scouring the net for some of the materials we wanted, including reclaimed roof tiles and windows for the filter house. We had numerous trips to local towns to pick up our bounty, ready to be stored and used once we got to the relevant stage.
Once spring 2011 arrived we were ready for the next push and completed the digging. We had deliberately not dug close to our neighbours fences incase the winter weather had caused the clay pond walls to collapse. There was not really any need to worry as there were very little in the way of cave ins, however we had to get this part finished off. The schedule we had set ourselves was quite punishing and the remaining spoil was removed over the course of a single weekend. If anything we probably pushed outselves too hard that weekend and it took a while to get over our strenuous efforts.
 |
| New fences up on the Left hand side, and back to the pond again! |
 |
| Some initial planting in the first raised bed. |
 |
| Rendering the walls. |
|
| Fences painted and the first raised bed is taking shape. |
In the run up to the Easter Weekend we had our largest delivery of materials to date, and our small front garden was piled high with over 400 high density concrete blocks and several tonnes of sand, gravel and cement. We are lucky that our local builders merchants are happy to deliver when we are out at work, but the first driver got his left and right mixed up and placed everything where I needed to park the car!
We decided to build each wall on separate footings, which made the overall job easier. It is traditional to pour a large solid concrete slab for the base with the walls built from the slab. However with the solid chalk (and checking with a local professional pond builder at our Koi Club) we knew that we were able to make our life easier without any risk to the structure.
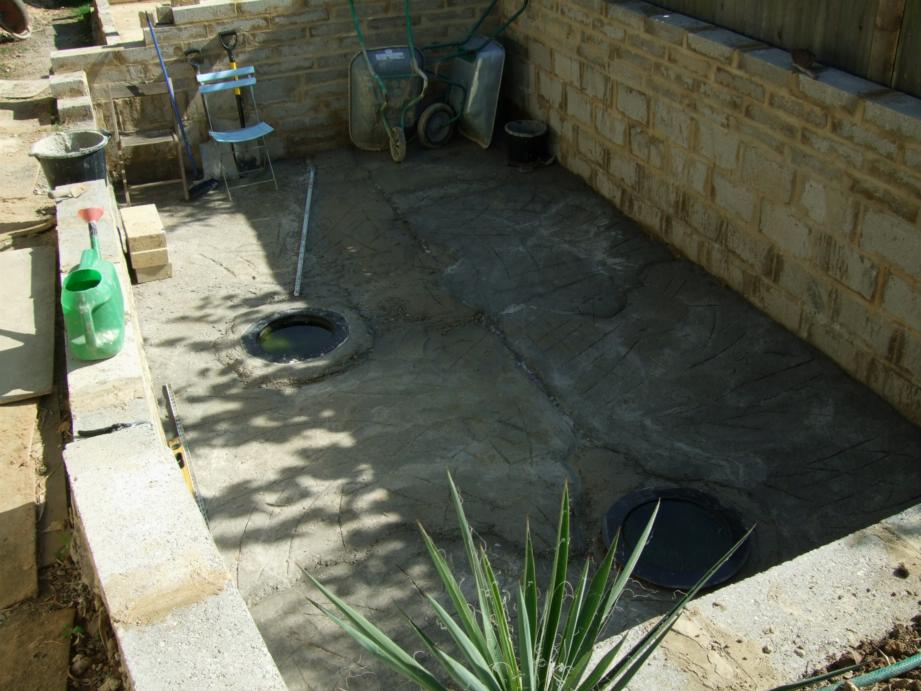
The first walls were going up in early July, which at last meant that the risk of the clay caving in was greatly reduced. Once the first three walls were built we had to put in the bottom drains. This was another new skill we had to learn, setting the pipes at the correct angle and the two bottom drains level. The final wall could then be built and the pond had all 4 sides!
|
| Pond showing the position of the filter pipework from the pond. |
The following weekend we planned to start laying the base. We looked into having a ready mix concrete delivery, however realised that with the time allowed to barrow it round to the back (and the awkward access) we would rather not have the pressure and allow us to work to our own pace. It was this weekend that Mark blogged about, unfortunately I was ill and was unable to be very much help. Mark loaded up the wheelbarrow at the front, brought round the mixed sand and gravel, added cement, water and hand mixed several tonnes of concrete. I was at least able to get each barrow load leveled. This was a major landmark in the project, all the walls were in and the base laid. If we had stopped at this point the pond would hold about 3,000 gallons.

The first two raised beds were now complete, with coping stones and rendered walls, and the first raised bed was partly planted. We could have left the planting until after the pond was finished but were keen to get plants established, so several previously pot grown plants were planted out, along with a few new additions.
By early September I was worrying that the weather may turn and we laid the base for the filter house. As it turned out we have had a very mild and dry autumn which has allowed work to continue at quite a pace.
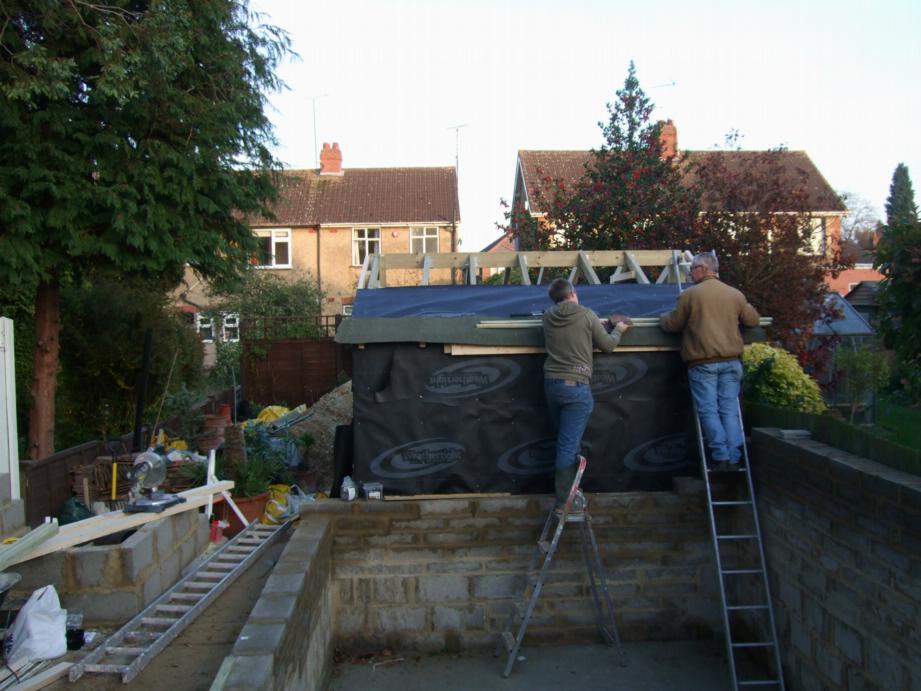
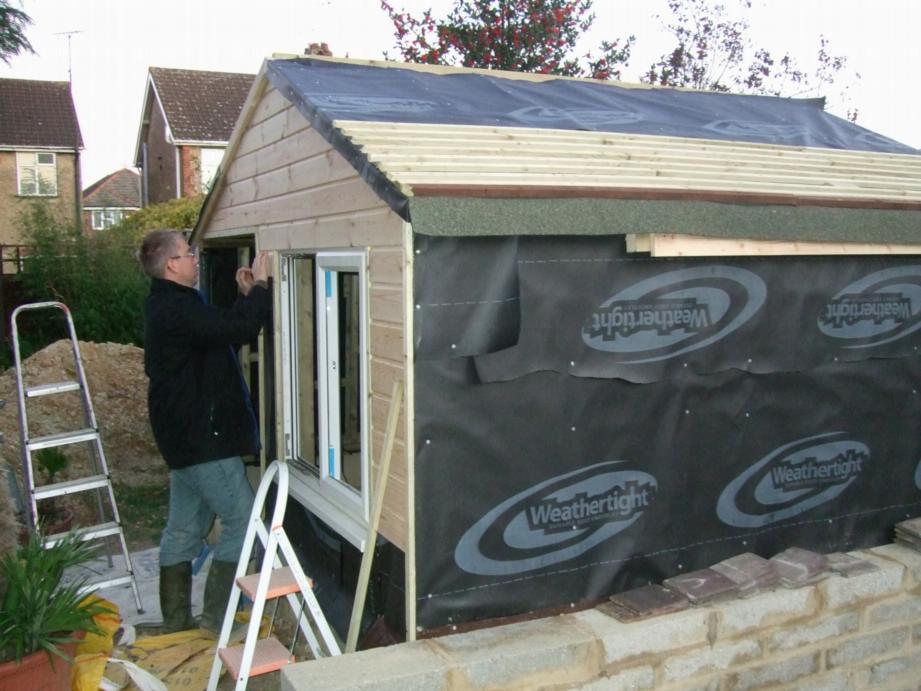
So with attention turned towards the filter house we laid the base and built the dwarf walls in October. The filter house is a wooden framed building supported on a concrete foundation and concrete block walls. As featured on this blog my dad was able to help us get the frame built quite quickly.
With the frame up we were able to get stuck into the tiling, (using the reclaimed tiles mentioned earlier), and by Christmas the roof was on and the walls clad in timber. The filter house is pretty much watertight going into the new year.
The mild weather continued into the Christmas period and we were able to build the final raised bed and the associated small water feature.
So with the start of a new year, thanks to the mild weather, we are ahead of schedule, with any luck we shall be finished before the summer starts!
Mark is planning to follow up this recap with a look into the design and research that has gone into this project, so stay tuned!
Gaz

Email This
BlogThis!
Share to X
Share to Facebook
Share to Pinterest


 This gardening blog follows our journey as we create our Tropical and Exotic themed garden. We hope you'll enjoy the journey as much as we do. We started our Exotic Garden in 2005 and this site will show its development, as well as our travels, both abroad and within the UK to gardens, nurseries and friends.


Everytime I look at what all you guys are doing I can't believe what you have accomplished so far. Just hand digging all of that is astounding. Everything is looking wonderful and it's so nice to know it will most likely be done by summer.
ReplyDeleteCher Sunray Gardens
Even though I have been watching this project all along, I really enjoyed this summary. Aren't you amazed at how much you have achieved!? ...all this and nice muscles, I bet.
ReplyDeleteFabulous post, really interesting to see progress all the way through so far.....is it the stress of the project that has turned Mark's hair white half way through the build?
ReplyDeleteThanks Cher, we're hoping that will be the case, if not earlier :)
ReplyDeleteGlad you enjoyed the summary Hazel, we're more than halfway there! It was intense last year but you get so absorbed with the project that you don't really appreciate how much can be done in a short period of time until you get the chance to sit down and look back at all the earlier photos :) I'm not so sure about the muscles though, we do compensate with lots of chocolates too, lol!
Thanks Clive, and your comment made me laugh here! No it's not the stress of the build that made my hair go white, it was peroxide, purple rinse, and all that basking under the hot sun we did during the warm spell in early October, lol! ;)
You have totally transformed this part of the garden. My daughter and I have been planning how we could do raised bed around the patio area using blocks like you have done!
ReplyDeleteMark and I are planning weekends away, I would love to find a B&B near you and maybe pop in sometime if that would be ok.
Great recap. I knew how far along you'd come from the last post but while going through this post, you still had me eager for the next picture. I can hardly wait for the finished product, complete with koi.
ReplyDeleteP.S. Your raised beds look wonderful.
What a project! I still can't believe you did all that by yourself, especially since neither of you is a builder. After this, you could literally build a house. I'm so in awe, I can't even tell you.
ReplyDeleteGerhard
:: Bamboo and More ::
Even though I thought I'd been along for the whole thing there were a few bits that were new to me, thanks for the comprehensive post. You're so smart to have documented it so well. I'm sure these shots will come in handy when Gardens Illustrated comes out to shoot their spread of the finished design!
ReplyDeleteWow! I am really impressed! I am looking forward to seeing the completed project. Sometimes I am intimidated by even a small project, if it involves building techniques I have never done before. You are an inspiration!
ReplyDeleteThis project is really incredible, a magazine worthy feat. Such dedication, it was really interesting to see it all laid out like this. I love the raised beds, I suspect you'll gain some hardiness with such good drainage. By next summer it's going to be quite the tropical grotto. Amazing!
ReplyDelete"I love it when a plan comes together!"
ReplyDeleteI'm glad you did this overview. It really shows your hard work and dedication. I think I'd forget the koi, and just use it as a swimming pool! ;) I do hope you're finished before the summer starts. Then you'll have all summer to enjoy seeing all your new fish swimming around. You are going to LOVE it!
ReplyDeletewell done that's some serious manual labour you are putting in there.
ReplyDeleteHey guys,
ReplyDeleteJust read through your post at lunch- and i jsut wanted to congratulate you on all your hard work! The pond is so nearly completed now- you must be so proud of yourselves! I imagine there were many time you looked at the mess outside and thought- what the heck have we done to the garden! Th eold tiles on the filter house look very pretty!
Cant wait to see more updates- what will the final pond hold (gallon wise) and when do you get to go Koi shopping?!! I cant wait to see that posting! :) How many Koi do you have at the moment? Will you keep it just Koi or put your goldfish in too?
Congratulations again
Owen x
One last question- What exactly is left to do before you get to fill the pond?
ReplyDeleteThanks Libby! Raised beds would be a great idea for your garden. I hope you go ahead with them and looking forward to seeing your progress on your blog. You guys are more than welcome to visit during the summer, message on its way! :)
ReplyDeleteBom, same here, looking forward to getting the project finished and seeing the finished product. And lots of relaxing by the pond afterwards :)
Indeed Gerhard, neither of us are builders, both white collar boys :) We spent lots and lots of time researching beforehand, with a bit of trial and error along the way. If there's a will, there's a way. As for building our own house in the future, who knows! :)
Loree, we've taken lots of photos along the way and we find it enjoyable ourselves, taking the time to look back at them and seeing what has changed since then. There's lots more to come! As for the Gardens Illustrated, one can dream :)
Thanks Debs! Initially I found this undertaking intimidating too, especially me (Mark) who has very little building skills beforehand. But lots of research and readings does help. Once this project is finished I have more confidence in doing more projects in the future, but more likely no longer as intense as this! :)
Thanks Nat! The extra drainage from the raised beds will be of great benefit to the plants, and indirectly gain some extra hardiness. Can't wait to finish all three beds and finalise the planting on all of them! :)
Great job lads. Is the bottom of the pond flat or does it taper towards the filters.??
ReplyDeleteMany thanks Holley! You're not the first one to suggest that we just make it a swimming pool rather than a pond, lol! Tempting it may be, we'll probably find more long term use for it as a pond over a swimming pool. The size and depth has something to do with what sort of koi we want to keep in it eventually. It'll be great if we finish this before summer starts, and can do lots of relaxing by then (in theory that is!) :)
ReplyDeleteThanks Sunny! Your blog looks fab btw!
Hey Owen, great to see you here, and many thanks! Yes there were moments when the mess gets through you but vision gets you through. Glad you like the tiles, I love 'em, just a shame the ridge tile has to be brand new but it will soon age and look like the rest.
We're hoping to achieve just over 8000 UK gallons including filters, and we can transfer our Koi and do more Koi shopping 2-4 weeks after fibreglassing (which needs to cure, filled up, and left on it's own for that period, drained and refilled again ready for fishes). We have 12 koi at the moment and can't wait to transfer them to their bigger home. More likely the big pond will only have bigger koi in it as smaller koi and goldfish might get stuck in the drains. The existing pond will be the home for our smaller fishes.
As mentioned, the fibreglass needs to cure before we can give it a final fill, and also the filtration must be fully installed before the fishes are introduced. Can't wait! :) And you must pop round for a visit once everything is sorted :)
Thanks for visiting Alex! :)
Cheers Don! The bottom of the pond tapers gently towards the drains. The slope isn't noticeable until water collects down the bottom (which it has with all the rain we're having) and you can see pooling first towards the drains :)
I really enjoyed your recap and appreciate the time and effort you have put into this amazing post. You must have the most well-loved plot in London, it's so inspiring. I get days when I look out of the window and think 'where do I start?' and you seem to just get stuck in. Bravo to you both!
ReplyDeleteAmazing work boys. I was at a local tropical fish shop yesterday (slowly stocking up my new tank) and stopped for a while to gaze at the beautiful koi they had (and beautiful prices!!!!) - I thought of you. Can't wait to see it finally stocked. Go to it!
ReplyDeleteDave
Talk about extreme DIY! Just loved your update and will be hungry for more.
ReplyDeletewaouh, it's more like a swimming pool ! I'm very impressed. Bravo guys. Have you thought of the planting inside it ?
ReplyDeleteThis really is an amazing project you guys have undertaking and it is coming along beautifully. Everyone out here can not wait until you are finished, but this post summarizing the progress was really great. I too thought it looks like a swimming pool. I saw I was not the first to say it though.
ReplyDeleteThanks Martin! Looking forward to getting the project finished too so we'll have plenty of time for more days outs. Lots of gorgeous gardens out there! We're enjoying the build though :)
ReplyDeleteDave, glad you remembered us when you saw some Koi :) not all koi are expensive, it depends on the dealer ;)
Thanks Alistair, I suppose it is extreme DIY indeed, hard work but enjoying it too! :)
Cheers Celine! No plants in the main pool I'm afraid as the Koi will just devour them all :)
Thanks Donna! It's not long and hopefully should be finished by this coming summer. The big size of the pond will affect the amount of Koi we can put in it as well as the size they can grow (hopefully big) :)
You should now take a long rest, both of you, and we are waiting for the wide angle ready-well-manicured garden. I salute those difficult work, i bet you got lots of muscles and calories gone for this project.
ReplyDeleteGaz & Mark this is tremendous..!!!b I cannot understand how come I have missed all this so far... You are doing an amazing project there & it is coming together so fast.! I know the weather has been with you too, so I am sure that helped, but it is an amazing project to undertake...
ReplyDeleteI shall be following the rest of your progress now though..
Keep up the great work... :¬)
Hi, very nice story to read, also thanks to the large amounts of photos! I recognise a lot of this since were sortof going through the same, except we wont be building as much and the pond will be for normal fish/plants so it wont be walled in. Im envious of your climate, since we intend to go as tropical as possible in the Netherlands! Hope all is going well for you and your plants this winter! Ive linked to this post on our facebook page, hope thats ok! :)
ReplyDeleteThanks Andrea, yes we seem to have gained some new Muscles, I'm looking forward to it being finished!
ReplyDeleteCoyotee, thanks for your comments, glad you found it now, hope you enjoy the updates in future blogs!
Hortus Botanicus, thanks for the kind comments, and link on your FB. We will have a look as would be interesting to see your project as well. I would assume that your climate is reasonably simialar to ours.
Wow, this is such an awesome project! :) Congratulations so far!!!
ReplyDeleteThanks for your comments James!, do check back for regular updates as we complete it!
ReplyDeletelooks like you've got your work cut out for you. Great job and please keep us posted at wormforums.com as well (especially pics). It looks like your garden is gonna look great!
ReplyDeleteNow that's a big pond! Enjoyed all the photos, seeing the project coming together. The planting is wonderful, I can just imagine how lovely this is going to look once it's finished, even more so when it all matures. Thanks for visiting my blog recently x
ReplyDeleteThanks for the comments! glad you enjoyed seeing the project so far. We must write a follow up post to this one as its moved on a long way since this blog.
ReplyDeleteMark and Gaz, you have got to be on Will Gillies new tev program what youve attchieved is fantastic
ReplyDeleteHi Carol, We love to if we had the opportunity.
ReplyDeleteOh my goodness you guys!!!! I am so in awe of you! LOL You had a dream and went for it. Thanks for the walk through and can't wait to see the finished backyard! I absolutely love that bed you planted! Wow!
ReplyDeleteHi guys, thoroughly enjoyed your 'story so far' and reminisced about all the similar pains we went through when building ours - except ours took years!!! It will all be worth it when you can relax and enjoy the fish with a glass of whatever tipple you fancy. We mostly build ours ourself too but used box-welded butyl liner. Even like yourselves, we continued to develop the rest of the garden during the project - you need to for sanity reasons. Can't wait to see the finished product with associated landscaping. I have no doubt you will derive much pleasure from your efforts.
ReplyDeleteimpressive!
ReplyDeleteThanks for comprehensive post on your project. You will soon have a first-class home for your koi. I'm looking forward to more of your project and the finished pond. And your Dad was wonderful to help you out--great job!
ReplyDelete